Sunny Studio Stamps : Build-A- Birdhouse
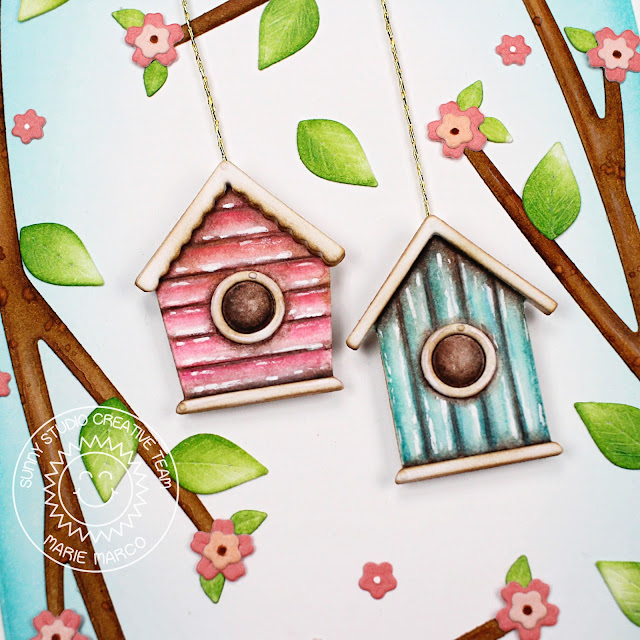
Hey there crafty friends! Today I am sharing a very spring inspired birthday card featuring Sunny Studio Stamps' Build-A-Birdhouse Dies . These dies create the cutest little birdhouses that pair so perfectly with their Out On a Limb Dies .
To begin, I used an A7 size die to cut out my card base from 110 lb heavyweight cardstock paper. I used bristol smooth cardstock for my background panel which I ink blended using Salvaged Patina Distress Oxide Ink. Then I adhered my inked panel to my cardbase using double sided tape adhesive.
Next, I die cut all the pieces from the Build-A-Birdhouse Dies, the Out On A Limb Die, as well as the adorable tiny flowers from the Wonderful Windows Dies . I cut out my birdhouses from watercolor paper, and used watercolor pencils from Faber-Castell to color each one in a shabby chic style. To give the houses dimension I die cut the roof about 5 times and stacked them up. For my flowers I cut them from pink shades of cardstock paper. All the tree limbs and leaves were cut from bristol smooth cardstock and inked using Vintage Photo and Mowed Lawn Distress inks. After inking, I went over some of the die cuts with color pencil for some extra shading,
I positioned all my tree limbs to create a frame. From there, I built up my scene by adding all the leaves and flowers using Bearly Art Precision Craft Glue. The last thing I added were the birdhouses. I used some foam tape on the back of each house to create a floating dimensional look and I added some gold twine to to back of the houses and glued it to the top of the tree branch. I then created some super tiny bows and attached them to the top for the cutest hanging birdhouses!
Moving on to the inside of my card, I stamped out a big Happy Birthday Sentiment using the Big Bold Greetings Stamp and cut it out using the Big Bold Greetings Dies . I used some extra leaves and flowers to create some cute floral accents and called this card done!
Thanks so much for joining me on this week's card inspiration! Until next time, Happy Crafting!


Comments
Post a Comment