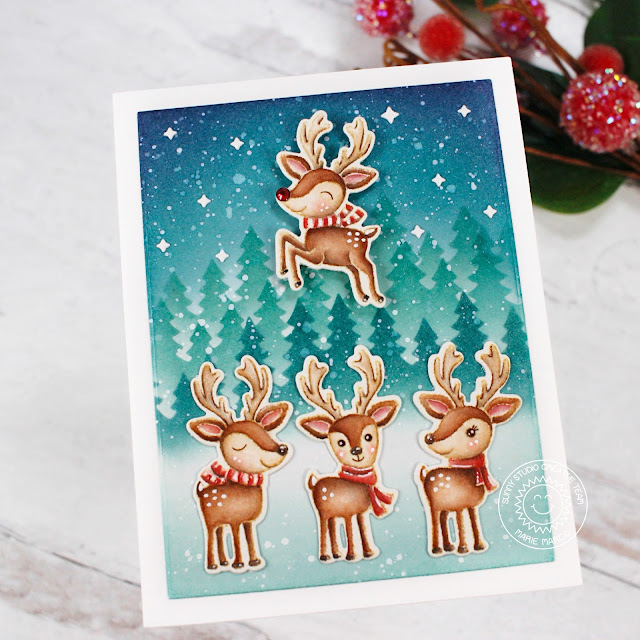
Sunny Studio Stamps: Reindeer Games
I am very happy to be back on the blog to share a new Holiday inspiration card with you featuring the recently released Reindeer Games Stamps .
Reindeers are some of my favorite images to color and create with during the holidays so I was very excited to make a card with this adorable stamp set!
The first thing I do before anything when cardmaking is to prepare my base and my background panels. I cut out my A2 sized base panel from 110 lb Sturdy Neenah solar white cardstock paper so that I never have a problem with my cards warping. Using a slightly smaller die from a nesting A2 die set, I cut out my background panel using bristol smooth white cardstock for easy ink blending.
I then prepared my background panel using the Sunny Studio Stamps Forest Trees Stencils . This layering stencil set creates such a beautiful background of lush pine trees that look like they fade out with the distance depending on how light or dark you go with your inking. I also love that these stencils are numbered so you know the order in which to use them when inking. For my tree stencils, I used Distress Inks. For layer number 1, I used a very light hand with the color Evergreen Bough, for the 2nd layer of trees, I used the same ink color and applied it with a bit more pressure to get a darker shade. For my 3rd layer, I used a combination of Evergreen Bough, Rustic Wilderness, and Uncharted Mariner Distress Inks for the darkest shade of all the layers.
After my trees were finished, I inked around my entire card background with Evergreen Bough and then for the top of my card, I inked a darker shade of Uncharted Mariner and Chipped Sapphire to create a night sky. I then used some water splatters and watered down acrylic paint to create a snowy backdrop.
I stamped the reindeer images using antique Linen on watercolor paper, and used water color pencils to color my images. I did some white detailing using a white gel pen. I then cut my images using the Reindeer Games Corresponding dies . I positioned my reindeers and adhered them all down using double sided tape adhesive. Flying Rudolph was adhered using double sided foam strips for dimension. I also gave Rudolph a bright shiny blinged out nose using the Sunny Studio Stamps Red Zircon Jewels . I find adding the one single red gem embellishment so charming, perfect for Santa's favorite reindeer. I didn't want to leave the inside of my card blank so I added a reindeer wishing everyone a Happy Holidays with the sentiments from the stamp set placed in a word bubble stamped in Candied Apple Distress Ink.
I am so so happy with how my card turned out! Thank you so much for stopping by the blog and I hope it gives you some ideas for all your upcoming Christmas Cardmaking and crafting! Until next week, Have an Awesome Day or Night! and as always, Happy Crafting!!!


Comments
Post a Comment