Sunny Studio Stamps : Holiday Greetings
Hello Crafty Friends,
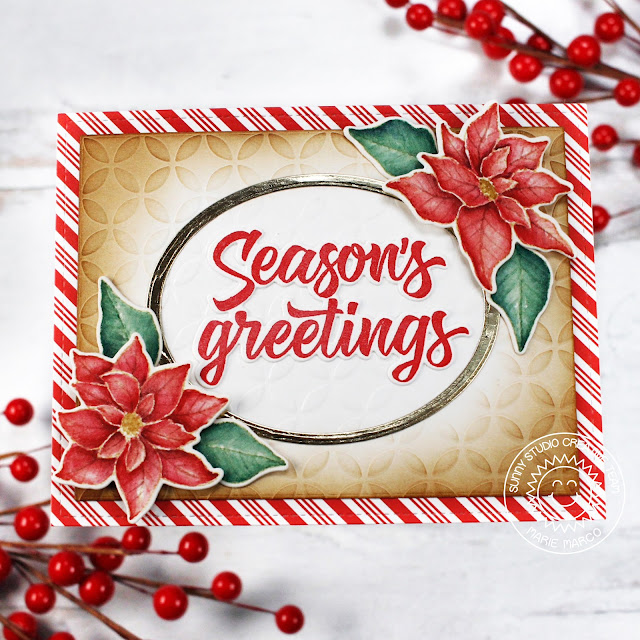
It is officially the Holiday Season! I am sure by now, most of us are busy preparing for the Holidays and that includes Holiday Cardmaking! Today I am sharing a card design that I think is perfect If you don't have much time to create but still want something super festive, simple, and classy. Today's card features Sunny Studio's Holiday Greetings Stamps which creates beautiful bold Holiday sentiments in a gorgeous cursive font! I absolutely adore them! I also used the Classy Christmas Stamps which features the classic super festive poinsettias that paired perfectly with the Holiday Greetings stamps.
To get started with my card, I die-cut an A2 size panel using 110 lb Neenah Solar White heavyweight cardstock. I then cut an A2 sized panel from Sunny's "All Is Bright" 6x6 pattern paper pack . I used the candy cane striped pattern paper and adhered that to my heavyweight cardstock. I then die-cut another slightly smaller rectangle from 110lb cardstock and used the Moroccan Circles 6x6 Embossing Folder to create a very simple but elegant texture to my card background. After embossing, I inked the outer edges with Distress Ink in the Colors Vintage Photo, and Walnut Stain. I created a gold accent frame for my sentiment by die-cutting a very thin frame from 2 oval dies.
I stamped my Seasons Greetings Sentiment using the Holiday Greeting Stamps and cut out my sentiment using the Holiday Greetings Coordinating Dies which is such an amazing feature of this entire set! I really love how you can cut out the sentiments because it makes placing them so easy!!! I stamped my poinsettia images from the Classy Christmas Stamps using Distress Ink in the color Antique Linen onto watercolor paper. I used Derwent Inktense water soluble pencils to color my images. Then I cut out my colored images using the Classy Christmas Coordinating dies .
After coloring, I put together my card by adhering my Moroccan embossed panel to the A2 paper panel using double sided tape adhesive. I then centered my Sentiment and glued it down using Bearly art Precision Craft Glue. I placed my gold oval frame around my sentiment and framed that using the two poinsettia images and leaves. Finally, I adhered my poinsettias using foam strips to create dimension and placed the leaves just underneath them.
That concludes my simple Holiday card inspiration for this week! Thank you so much for joining me today on another card adventure! I hope you have an amazing week! Until next time, happy crafting and cardmaking!!! -Marie


Comments
Post a Comment